Express.js using VS Code and Nodemon Debugging
Debugging is an essential part of the development process as it allows you to identify and fix issues in your code more effectively. In this blog post, we'll explore how to set up debugging in an Express.js application using Visual Studio Code (VS Code) and Nodemon. Let's get started!
Prerequisites
Before we begin, make sure you have the following installed on your machine:
- Node.js and npm (Node Package Manager)
- VS Code (Visual Studio Code)
Step 1: Create an Express.js Application
First, let's create a new directory for our Express.js application and navigate into it:
mkdir my-express-app
cd my-express-app
Next, initialize a new Node.js project by running the following command and following the prompts:
npm init -y
Create a new file called app.js and add the following code to set up a basic Express.js server:
const express = require('express');
const app = express();

app.get('/', (req, res) => {
  res.send('Hello, World!');
});

app.listen(3000, () => {
  console.log('Server is running on port 3000');
});
Step 2: Configure the VS Code Launch Configuration
To enable debugging in VS Code, we need to configure the launch settings. Open the project in VS Code using the following command: Type following in the cmd prompt-
code .
To enable debugging in VS Code, follow these steps:
-
Open the project in VS Code.
-
Press Ctrl+Shift+D on your keyboard to open the Debug view in VS Code. Alternatively, you can click on the "Debug" icon in the left sidebar.
-
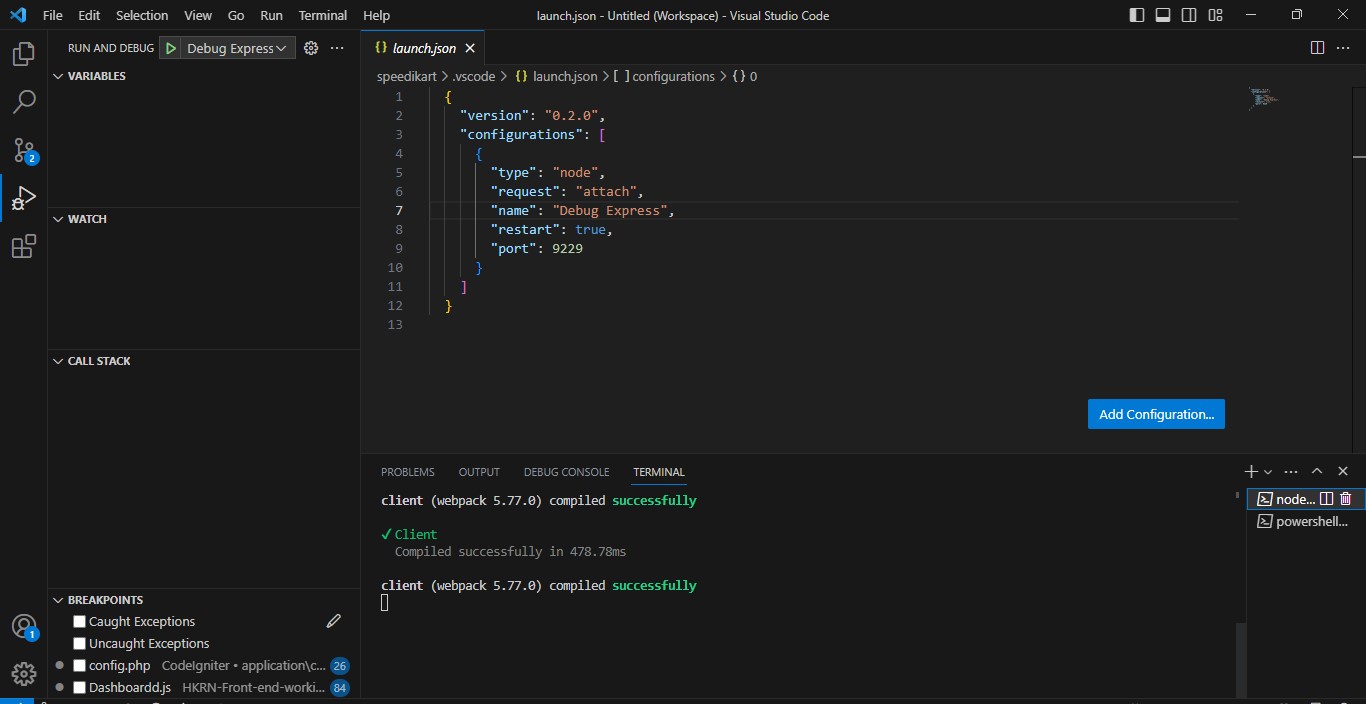
In the Debug view, you'll find a dropdown menu with a gear icon in the top left corner. Click on the gear icon to open the launch.json file.

-
If you already have a launch configuration file, make sure to select it. Otherwise, click on "Add Configuration" to create a new launch.json file.
-
In the launch.json file, you can replace the existing content with the following configuration:
{
  "version": "0.2.0",
  "configurations": [
    {
      "type": "node",
      "request": "attach",
      "name": "Debug Express",
      "restart": true,
      "port": 9229
    }
  ]
}
- Save the launch.json file.
Step 3: Install Nodemon and Update the npm Script
Nodemon is a helpful tool that automatically restarts the Node.js application whenever changes are detected. Install Nodemon globally by running the following command:
npm install -g nodemon
Next, modify the "scripts" section in your package.json file to use Nodemon for starting the Express.js server:
"scripts": {
  "start": "nodemon --inspect=0.0.0.0:9229 app.js"
}
Step 4: Start the Express.js Application
To start the Express.js application with Nodemon, open a terminal in VS Code (Ctrl+` ) and run the following command:
npm start
Step 5: Configure Chrome Browser for Debugging
To debug the application in the browser, we need to configure Chrome for debugging. Follow these steps:

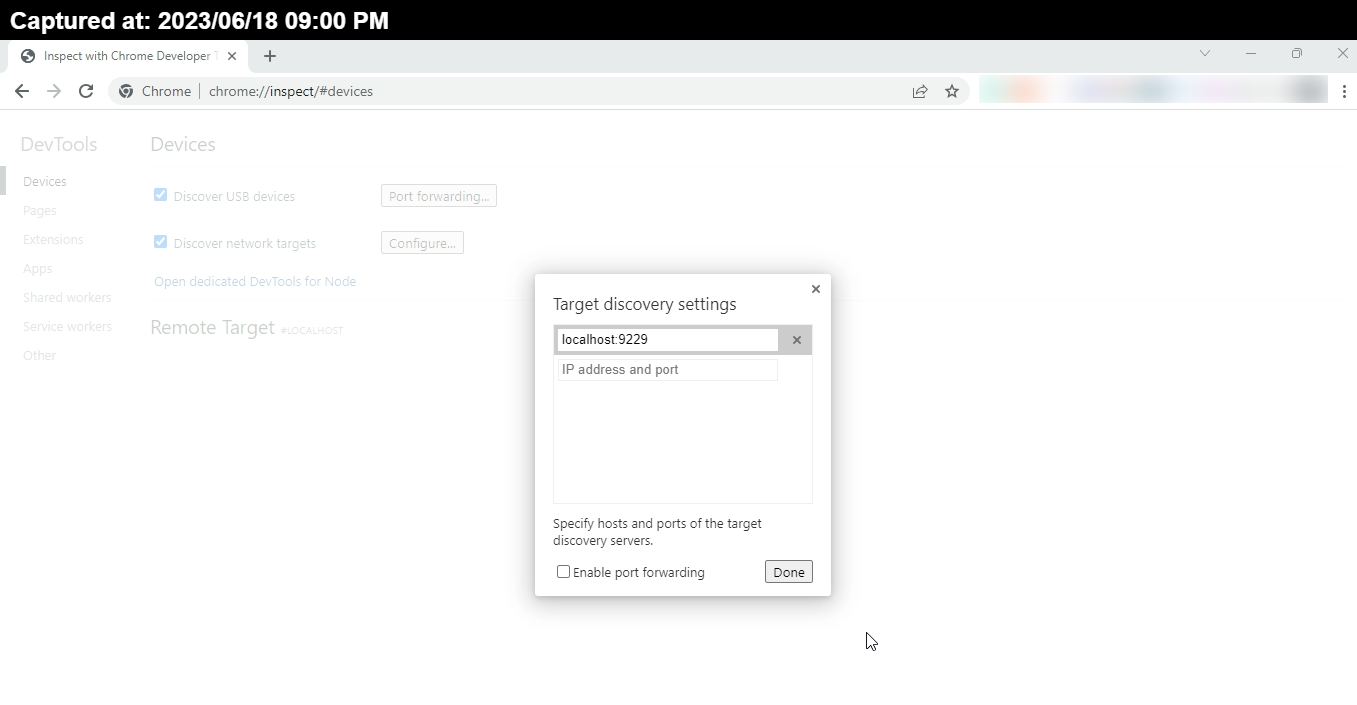
- Open a new tab in Chrome and navigate to
chrome://inspect. - Click on the "Configure" button under "Discover network targets."
- Add
localhost:9229to the list of addresses.
Step 6: Start Debugging
Now it's time to start the debugging process:
- In VS Code, select the "Debug Express" configuration from the Debug dropdown menu (top left).
- Click the green "Play" button to start debugging.
- Set breakpoints in your code where you want to pause execution.
Step 7: Trigger a Browser Hit
To test the debugging setup, open a new tab
in your browser and navigate to http://localhost:3000. The execution should pause at the breakpoints, allowing you to inspect the code and variables.
Conclusion
You have successfully set up debugging in Express.js using VS Code and Nodemon. Debugging enables you to pinpoint and fix issues in your code more efficiently, ultimately improving the quality of your application.
Feel free to explore additional debugging features and tools available in VS Code to enhance your debugging experience further. Happy debugging!
 Youtube Link